Digital radio interfaces are small in-car devices which receive DAB radio stations and use the original car radio. These solutions are useful if you would like to preserve the original radio. They’re also good if you don’t want an add-on adapter on the dashboard.
Radio stations are chosen using the steering wheel buttons or a remote control. The name of the station when listening or browsing for another station is shown on the existing radio and instrument display. This could make an interface easier to use than an add-on adapter with its own display and buttons.
Although interfaces are more difficult to install than a DAB adapter the end result is often tidier. The interface could be installed behind the radio or in the glovebox. Only the DAB aerial will be seen on the windscreen and the 12V socket may still be available to use, unlike with an add-on adapter.
There are a few types of DAB car interfaces:
- When a car has a USB socket and steering wheel controls a DAB USB interface could be used. Browsing for stations is like choosing music on a memory stick.
- If your vehicle has steering wheel controls but not a USB socket an interface that uses FM may be best.
- For cars without steering wheel controls or USB sockets there are interfaces which have a remote control and send the audio over FM.
To find out which is the best option for your car you could speak to an installer or look at the websites for AutoDAB and Dension.
The cost of buying and having an interface installed could be considerable depending on your car. Most integrated interfaces cost more than £100. If you would also find Bluetooth, aux-in or a USB socket useful a replacement stereo might be better. Car digital radio adapters are the cheapest and easiest to install.
Install a DAB digital radio interface in a car
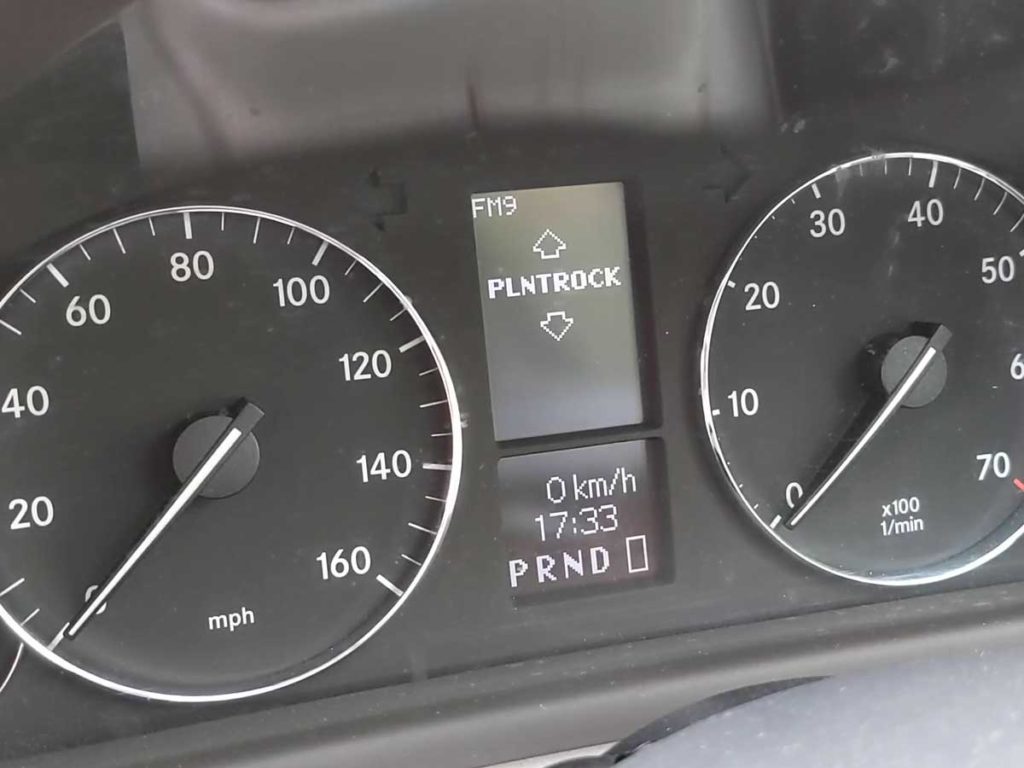
We will install an AutoDAB interface which is controlled with the steering wheel buttons. To hear the digital radio stations we’ll tune into the FM frequency that the AutoDAB device provides. All cars are different when it comes to their features and construction. Below we will describe the process in general terms.
It is worth taking your car to a professional technician who has the experience and tools to complete a high quality installation.
1. Pre-installation checks
Check that you have everything required to perform the installation. To avoid damaging the interior of the car it’s a good idea to use trim removal tools rather than screwdrivers. Instructions for removing the factory radio are available to read or watch online for many models. You could follow those steps to remove the radio and work out where best to place the DAB unit.
Read the installation instructions for your device fully before starting the installation. If it didn’t come with any you should be able to get them from the manufacturer.
Take relevant precautions when working with car electrics.
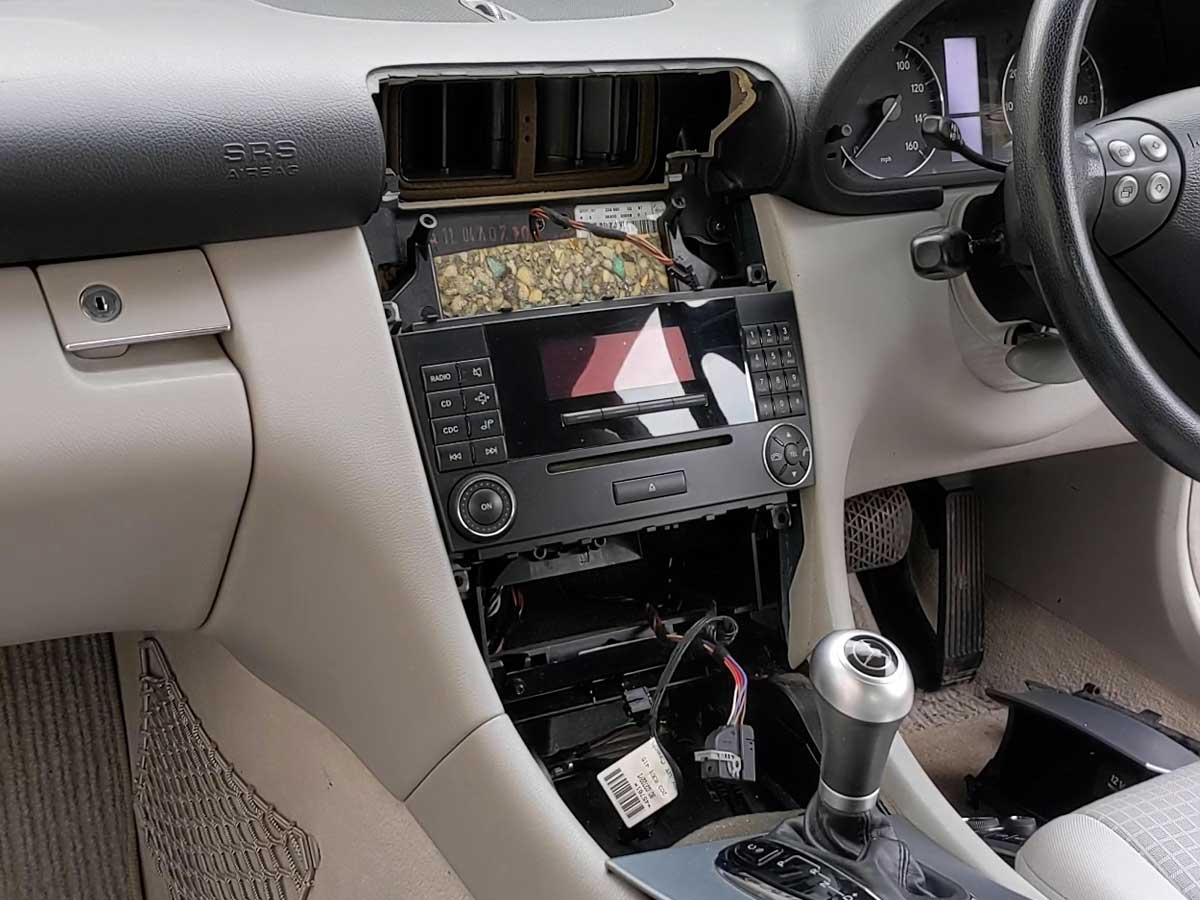
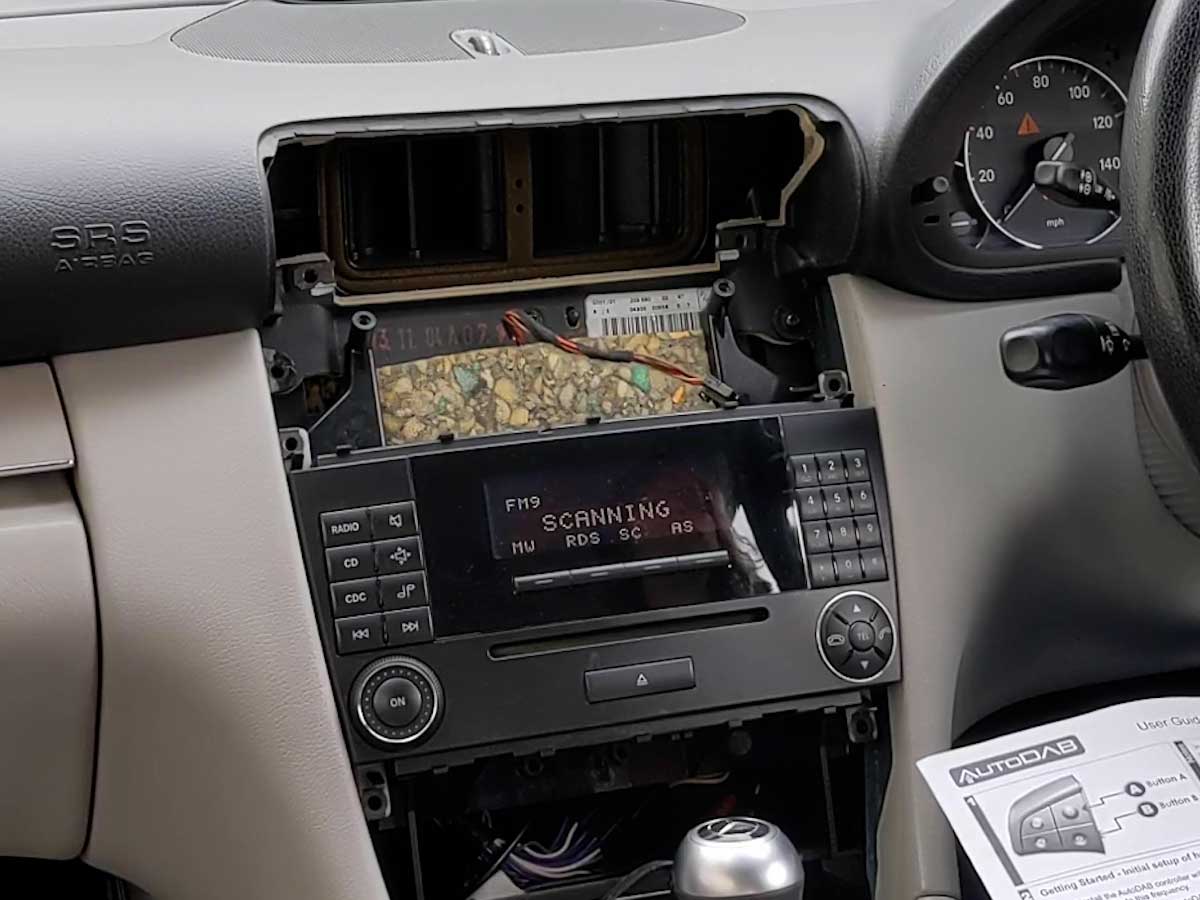
2. Remove the trim and car radio
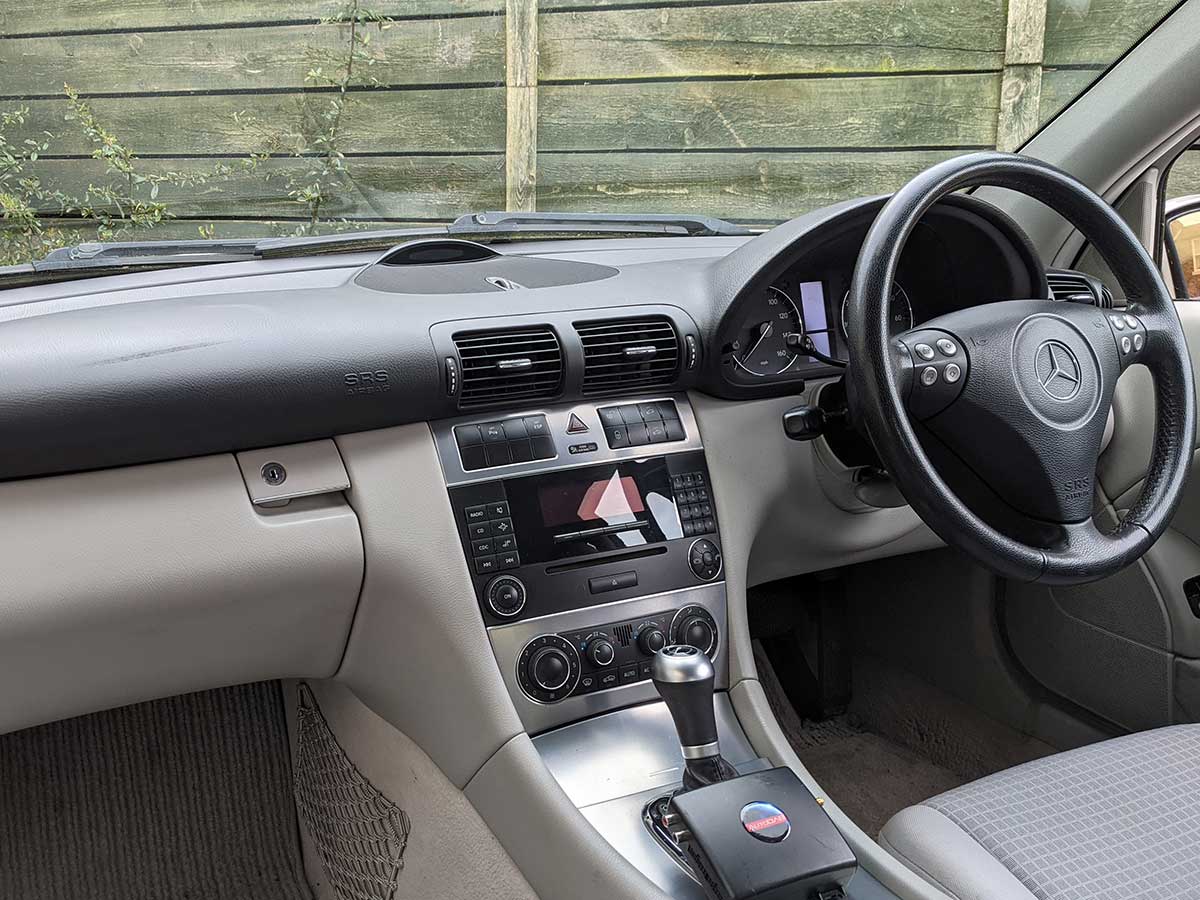
To install the interface in the C-Class we need to remove the original radio. The interface will plug in to the back of the factory radio. This necessitates removing the centre console vents, buttons, HVAC controls, ash tray and gear selector surround to gain access to the screws holding in the radio.
For the aerial installation we also need to partially remove the door seal, the A-pillar trim and the side of the glovebox. The glove box door is also removed to make access easier but this could have been left on.
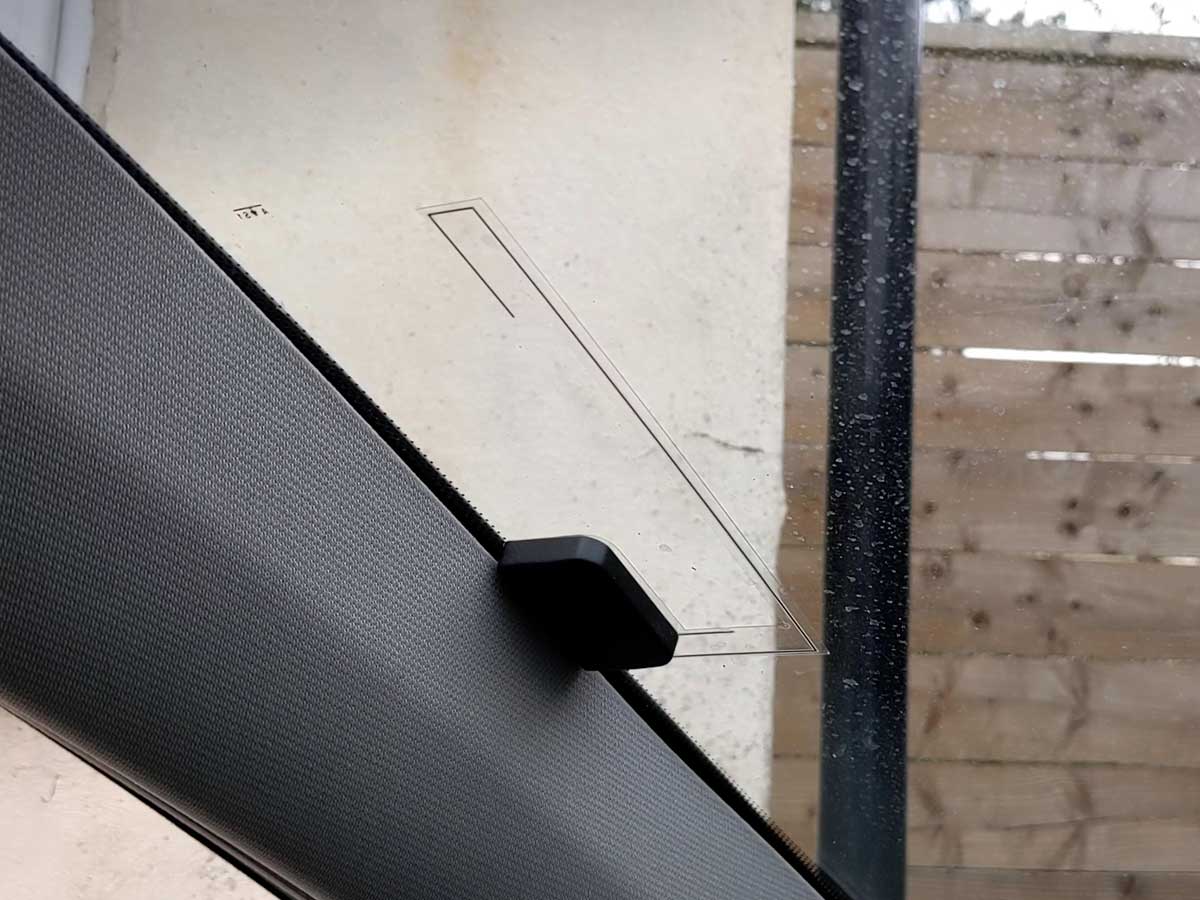
3. Installing the DAB windscreen antenna
A windscreen antenna is installed for reception of DAB digital radio stations. The original aerial is still used for FM and AM radio stations.
The steps in our DAB windscreen aerial installation guide were followed to install the aerial. Power may be required if you are using an active DAB aerial.
The cables come down the A-pillar and under the glovebox. The A-pillar trim is reinstated and there is no visible sign of the cables.
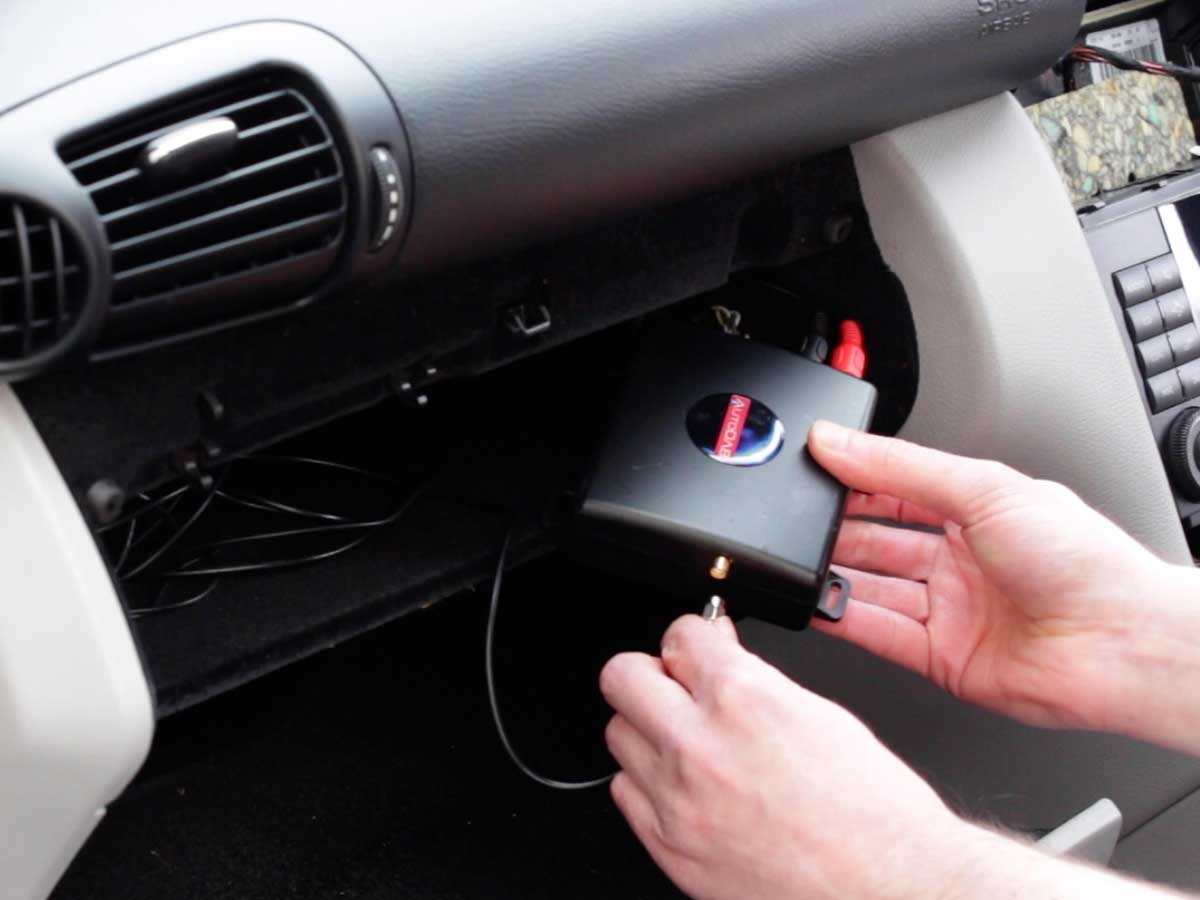
4. Installing the DAB interface
Positioning the device will likely depend on the length of the cables and the space in the dashboard. In this car there is a useful space in the glovebox.
On the side of the shelf is a perforated square which can be removed with a screwdriver. This might be intended for the CD changer connection, but as the car doesn’t have one it makes a useful place for the new device.
The cable harness between the device and the car radio is installed as well as the aerial connection. The interface sits between the car’s aerial and the radio so that the digital stations can be heard on an FM frequency. The DAB aerial is also plugged in.
5. Scanning for stations
When the interface is turned on it starts scanning for stations. If your device doesn’t do this you may have to initiate a scan through the menu. If the connections have been made successfully and the aerial is working you should now receive some stations. Try browsing the stations using the remote or steering wheel controls.
If the interface advises of ‘no signal’ or didn’t find any stations there could be a problem with the aerial. Check the connections and try scanning again.
If there’s no audio coming to the radio check the aerial connections. The interface has an FM aerial input and an FM aerial input. They are colour coded but use the same type of plug, so check they are the correct way around.
6. Reinstate the interior
With everything switched off the interior trim and the radio can be put back into place. The cable harness could make it difficult to push the radio back. Take care not to trap the harness or squash the wires. It may be possible to tuck the bulky connectors out of the way.
The interface should be secured so that it doesn’t move around when driving. This could make it rattle or cause connections to become loose over time. Sticky pads, velcro or cable ties could be used. The AutoDAB interface we are using has four lugs which could be used.

7. Set up the interface
With everything installed it’s a good idea to test everything again. If the interface has stopped working a connection could have come undone.
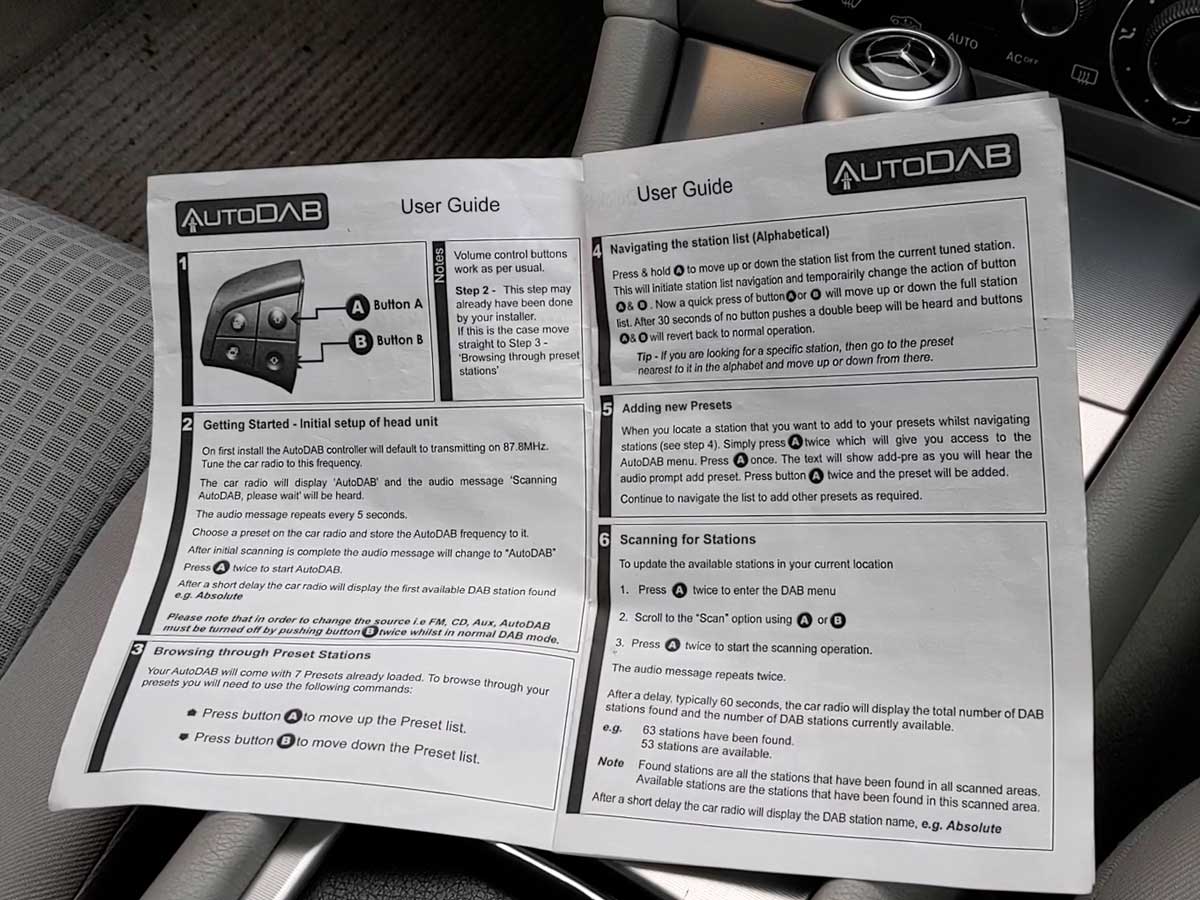
To make it easier to browse favourite stations it’s worth saving some presets. If using an adapter with steering wheel controls the presets will be saved in a list and not on the buttons on the original radio. When you use the up and down buttons you will browse the list of presets.
The scrolling text may be enabled on your interface. This can be quite distracting and it should be possible to turn this off so that just the station name is shown.
8. Familiarise yourself with the functions
The manual for the DAB interface should explain how the functions work and how stations can be selected. To avoid distractions while driving you could memorise how to browse stations and recall presets with the buttons.
Finally, check if and how the device can be switched on and off. It may be necessary to switch off the DAB interface to go back to FM radio stations. If you travel to an area with poor or no DAB coverage you may wish to switch to normal FM stations.