If you’re struggling to receive digital radio stations on your radio, hi-fi, tuner or AV receiver an outdoor DAB aerial could help.
Most hi-fi’s and receivers do come with a wire DAB antenna in the box, but they can be unsightly stuck to a wall. It can also be difficult to position the antenna in a bookshelf or AV cabinet for the optimal reception of DAB stations.
Digital radio aerials can help overcome these issues and are inexpensive and easy to install for most DIYers. Professional installers can also fit a DAB aerial for you.
Check your radio for a F connector
Before buying or having an aerial installed you should check that your radio or hi-fi can use an external aerial. This will be confirmed in the manual for your radio.
If you need to check you should be able to see a connector on the back of the radio or hi-fi which is labelled ‘antenna’ or ‘aerial’. This should undo and come away. DAB aerials use the F-type connector.
Many portable radios have a telescopic aerial which cannot be removed.

Omni-directional or directional outdoor DAB aerial?
There are two types of DAB aerial to choose from, and which you select depends on what you need from your new aerial. There are hundreds of digital radio transmitters around the UK and DAB radios will pick up signals from different directions.
You may receive BBC radio stations from a transmitter to the north, local radio stations from a transmitter to the south and national commercial radio stations from a transmitter in the east.
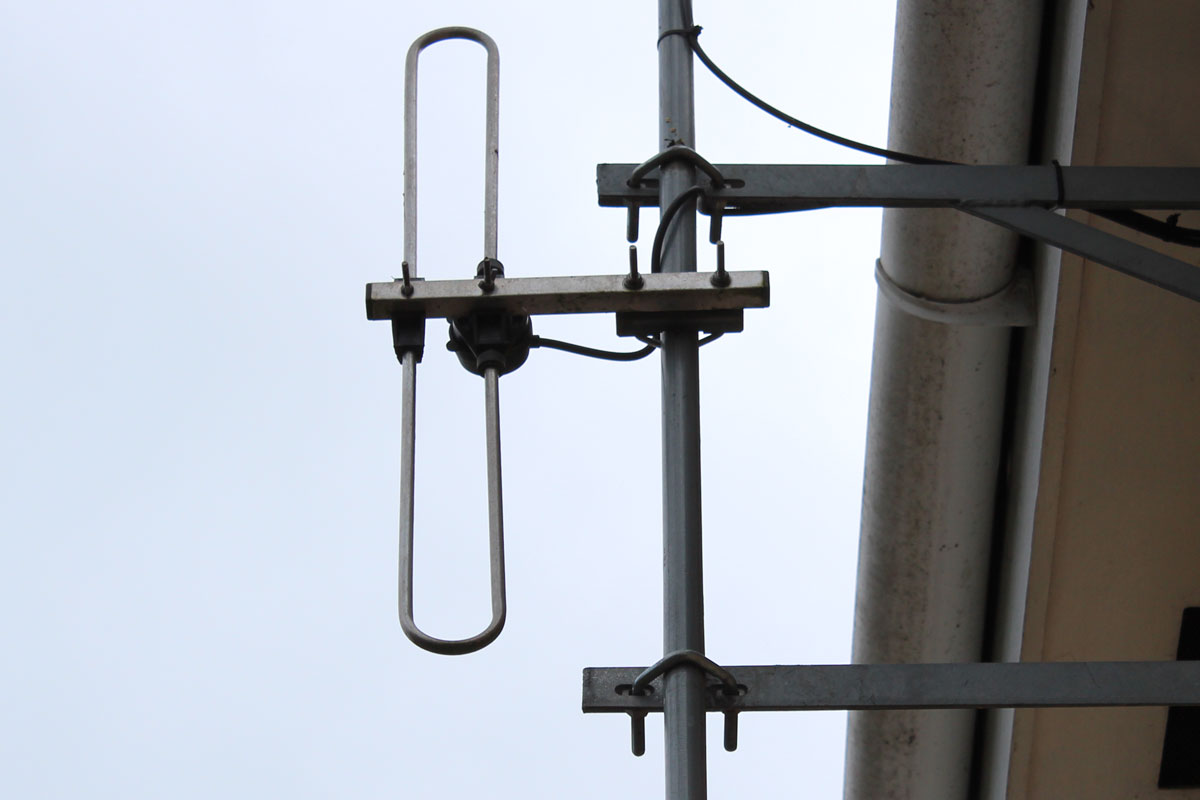
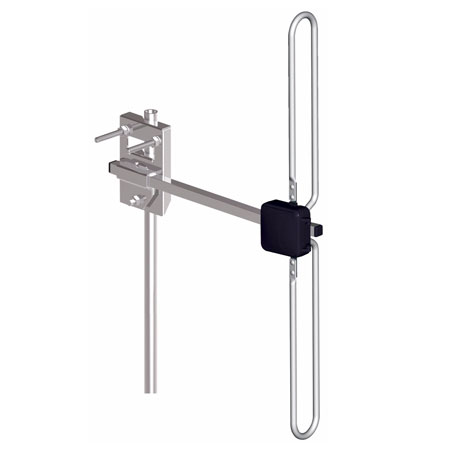
If you’re looking to improve reception of all the digital stations available in your area an omni-directional aerial will be the best choice.
However, if reception is poor you may wish to decide which stations are more important to you. If you’d like to receive your local BBC and commercial radio stations, or BBC Radio 4 and Classic FM, you can choose a directional DAB aerial and point it at that transmitter.
| Omni-directional DAB Aerial | Directional DAB Aerial |
|---|---|
 |
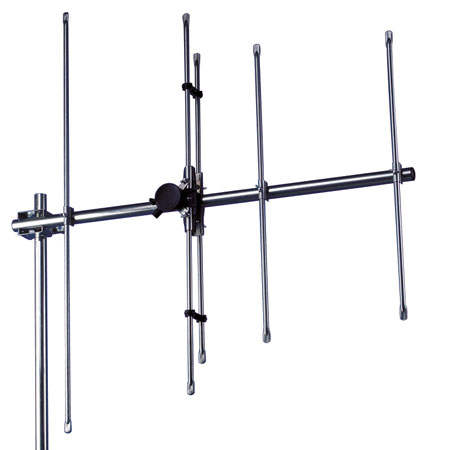 |
A directional aerial can do a better job at pulling in those signals than an omni-directional one.
Unfortunately we don’t know which will be the best aerial for your location or needs. If you have good digital radio reception with other DAB radios an omni-directional aerial will normally suffice.
Shopping list
Working at height can be hazardous. If you are unsure about installing your own aerial you may wish to contact a local aerial installer. We recommend using an installer from the Get Me Viewing website.
Once you’ve chosen your aerial you’ll need a few more things to install it, as well as the appropriate tools.
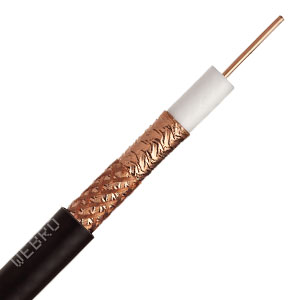 |
Cable. A high quality cable should be used to connect the aerial to your radio, receiver or distribution system. Webro WF100 cable is used by aerial installers, Sky’s engineers and is made in the UK. You can buy cut lengths online to your required length to save purchasing a whole reel. |
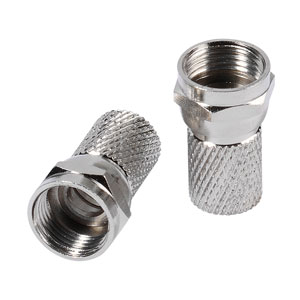 |
F plugs. Some DAB aerials have an F type connecter, whilst others have screw down connections inside a waterproof cover. Most radios, tuners and hi-fi systems which have a DAB connector will use a F plug. Your distribution amplifier may use F plugs, the Belling-Lee type or a screw down connection. |
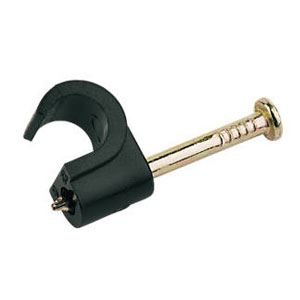 |
Cable clips. Cables should always be secured with cable clips at appropriate intervals. This prevents the cable or aerial from being damaged by weather. |
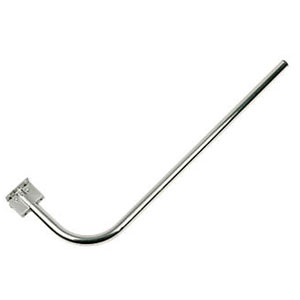 |
Pole or wall bracket. Many DAB aerials come with a bracket for you to mount the aerial at 90 degrees to a suitable pole. If you already have an aerial pole on your house you could use this, or buy a short pole and bracket. In a loft you can use a loft kit – these are smaller, but are not subjected to the same weather as an aerial installed outside. |
Example installation
Every installation will be unique with different options and considerations. However, we’ve installed a DAB aerial in a house to provide a general example for you to follow and adapt. Reception is good here, so we’re using an omni-directional aerial.
1. Choose the location for the aerial
The roof or gable end is the best place to install an aerial, but this isn’t always possible. An attic space is the next best option. You’ll need to consider access for the installation and how the cable will be routed. You should also check whether any planning restrictions would prevent installation, such as a conservation area.
In our example it wasn’t practical to install the DAB aerial on the roof or gable end. Instead we chose to mount the aerial in the attic using a loft kit. This comprised a bracket which is affixed to the wall and a pole with a 90 degrees bend.
2. Assemble the aerial
Instructions are supplied with DAB aerials, but some are so simple that they are already assembled in the box. You may need to fix the mounting part with a nut and bolt at 90 degrees to the aerial itself.
Our example aerial came with a butterfly nut, making it easy to assemble. Putting the aerial together now helps with the next step.
3. Mount the wall or pole bracket
Many DAB aerials come with a bracket which is suitable for mounting to a pole. The clamp will go around an existing pole or one which you install for the aerial. This is ideal if you already have a TV aerial pole on the house or are using a loft kit.
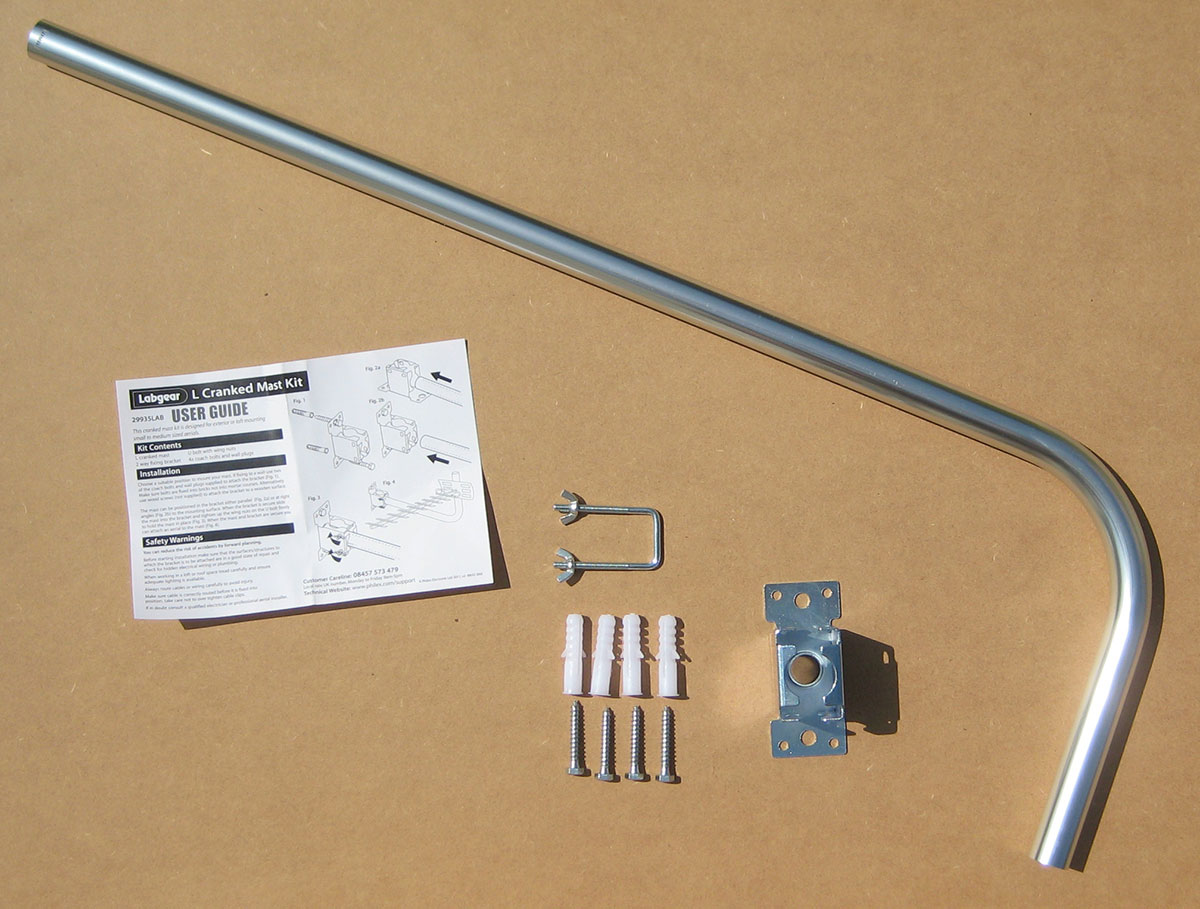
If you need to install a pole you can buy a specific aerial kit. Some loft kits are suitable for installing DAB aerials outside, but many are not built to withstand the weather and may breakdown over time. Another option is a 6″ wall bracket and 1″ pole.
A simple loft aerial kit was sufficient for our example. We attached the aerial to the top of the pole and fitted the bracket to the opposite end. This allowed us to find the highest place on the wall where the bracket can be attached.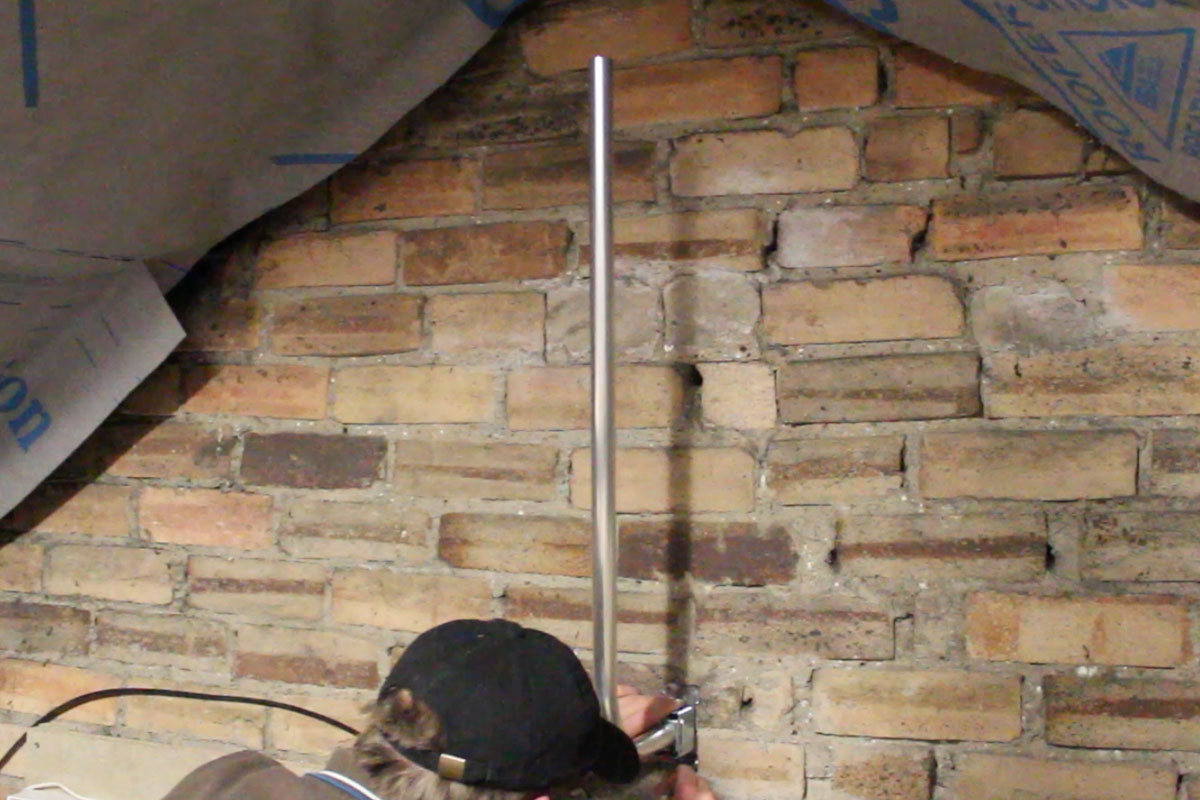
Four holes were marked, checked with a level and drilled. The loft kit came with four wall plugs and bolts. We removed the aerial from the pole, then fitted the pole to the bracket. The pole should be vertically level.
4. Prepare the cable
With the pole in place you can measure how much cable you will need. If possible it’s best to run the cable from the aerial to the radio and cut with a little slack after you are sure it will be long enough. Adding joins to the cable later could affect the signal. Don’t touch those cable clips yet!
DAB aerials typically have two ways of connecting the cable. One is with a screw-down clamp inside a weatherproof box, and the other is with an F plug.
To fit an F plug you’ll need to strip away around 20mm of insulation. Specific tools can be purchased to strip insulation by moving it around the cable, but a craft knife or Stanley knife can be used with caution. On a protective surface make a small incision with the knife, being careful not to cut any of the braiding underneath.
If you fold the cable carefully you should see some of the braiding. If it appears to be cut by the knife it’s best to snip the end off and start again. If it all looks fine the next incision can be made carefully until the insulation is all removed.
Separate the braiding and pull it back against the cable so it covers the insulation. The centre foam or transparent dielectric now needs to be removed. Using the knife repeat the earlier technique, making a cut just above the braiding. The copper braiding and inner conductor should not be able to touch.
Now the F plug can be twisted on to the cable. Keep twisting the F plug until the dielectric meets the hole in the bottom of the plug. Check that the braiding isn’t touching the centre copper conductor.
Finally the centre conductor can be cut with a few millimeters protruding from the connector. Cutting with cable cutters at an angle will make it easier to insert into the connector. The excess braiding can be cut off with the knife or scissors.
5. Connect the aerial and mount on the pole
It can be easier to connect the cable to the aerial at ground level and bring it to the pole. This is especially true if you have an aerial with a screw-down connection.
If you’re mounting to the top of a loft kit pole or the end of a TV aerial mast it’s worth keeping the clamp on the aerial. This will make it easier to slide over the end and tighten up. If you need to attach the aerial between two wall brackets the clamp will need to be removed.
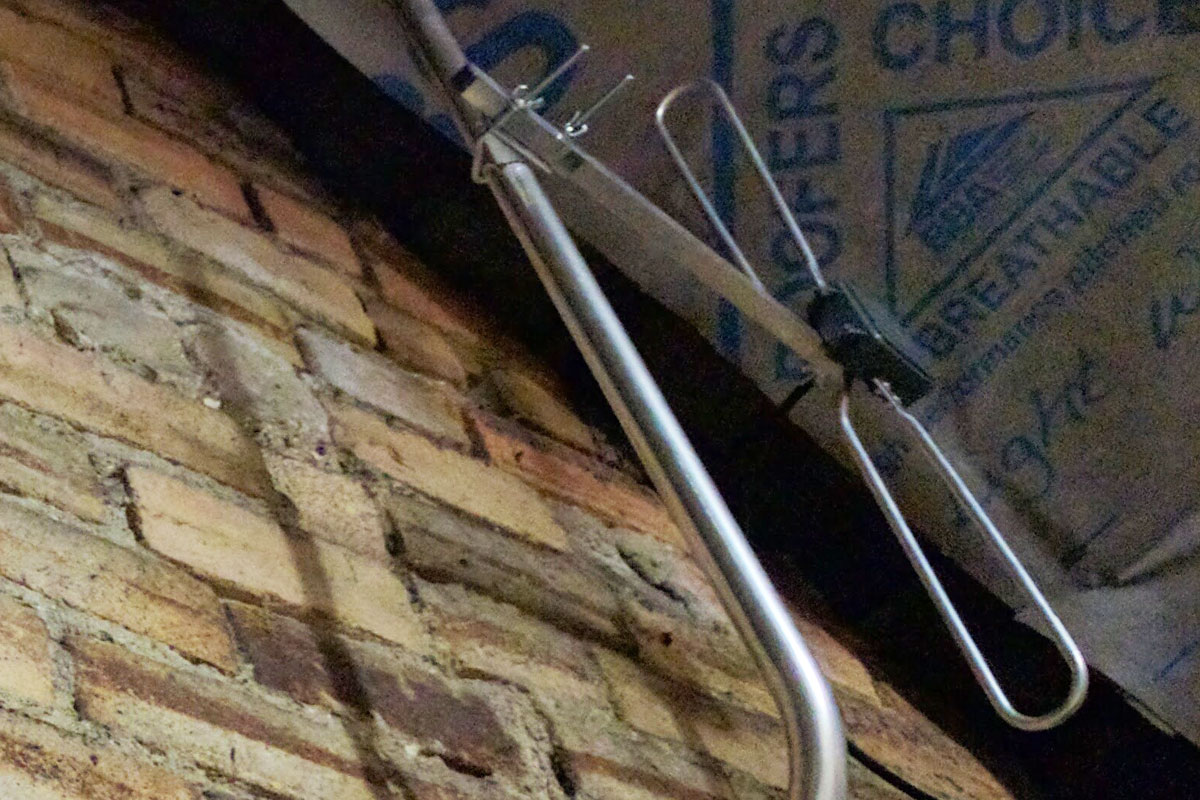
In our example the clamp was slid over the top of the pole and the two nuts tightened up. Some slack was left in the cable to allow for repositioning. With the aerial in its desired position the cable route can be finalised. Cable clips should be used for the route – leaving the cable untethered will increase the chances of it or the aerial being damaged. Cable clips should also be used in a loft to prevent trips, falls and You’ve Been Framed appearances.
6. Connect the radio or hi-fi
You should now have the aerial connected and the cable run to your desired location. It’s worth checking the cable over for any breaks before fitting the F plug. If you’re working with a small length and have some excess cable you can fit the F plug to the end. If you’re using a drum or reel of cable you will need to make a cut. Ensure you have plenty of slack to allow for moving the radio in future.
Follow the above process for fitting an F plug, and connect it to your radio, hi-fi, tuner or AV receiver. You can now perform a rescan or auto-tune. You should receive all the stations you did before with the basic aerial which came with the radio.
If there’s no reception at all, or it is worse than you had before, remove and check both F plugs. The braiding should not touch the copper centre, which should be protruding from the end of the plug. Check the cable for damage. You can also experiment with the position of the aerial – turning it around on the pole. It should still be kept in a vertical position.
Conclusion
An external DAB aerial can offer better reception of digital radio stations than a small, wire antenna which comes with many hi-fi’s and tuners. DAB aerials can installed by a DIYer for under £40. Television aerial installers can normally professionally install a DAB aerial too.